
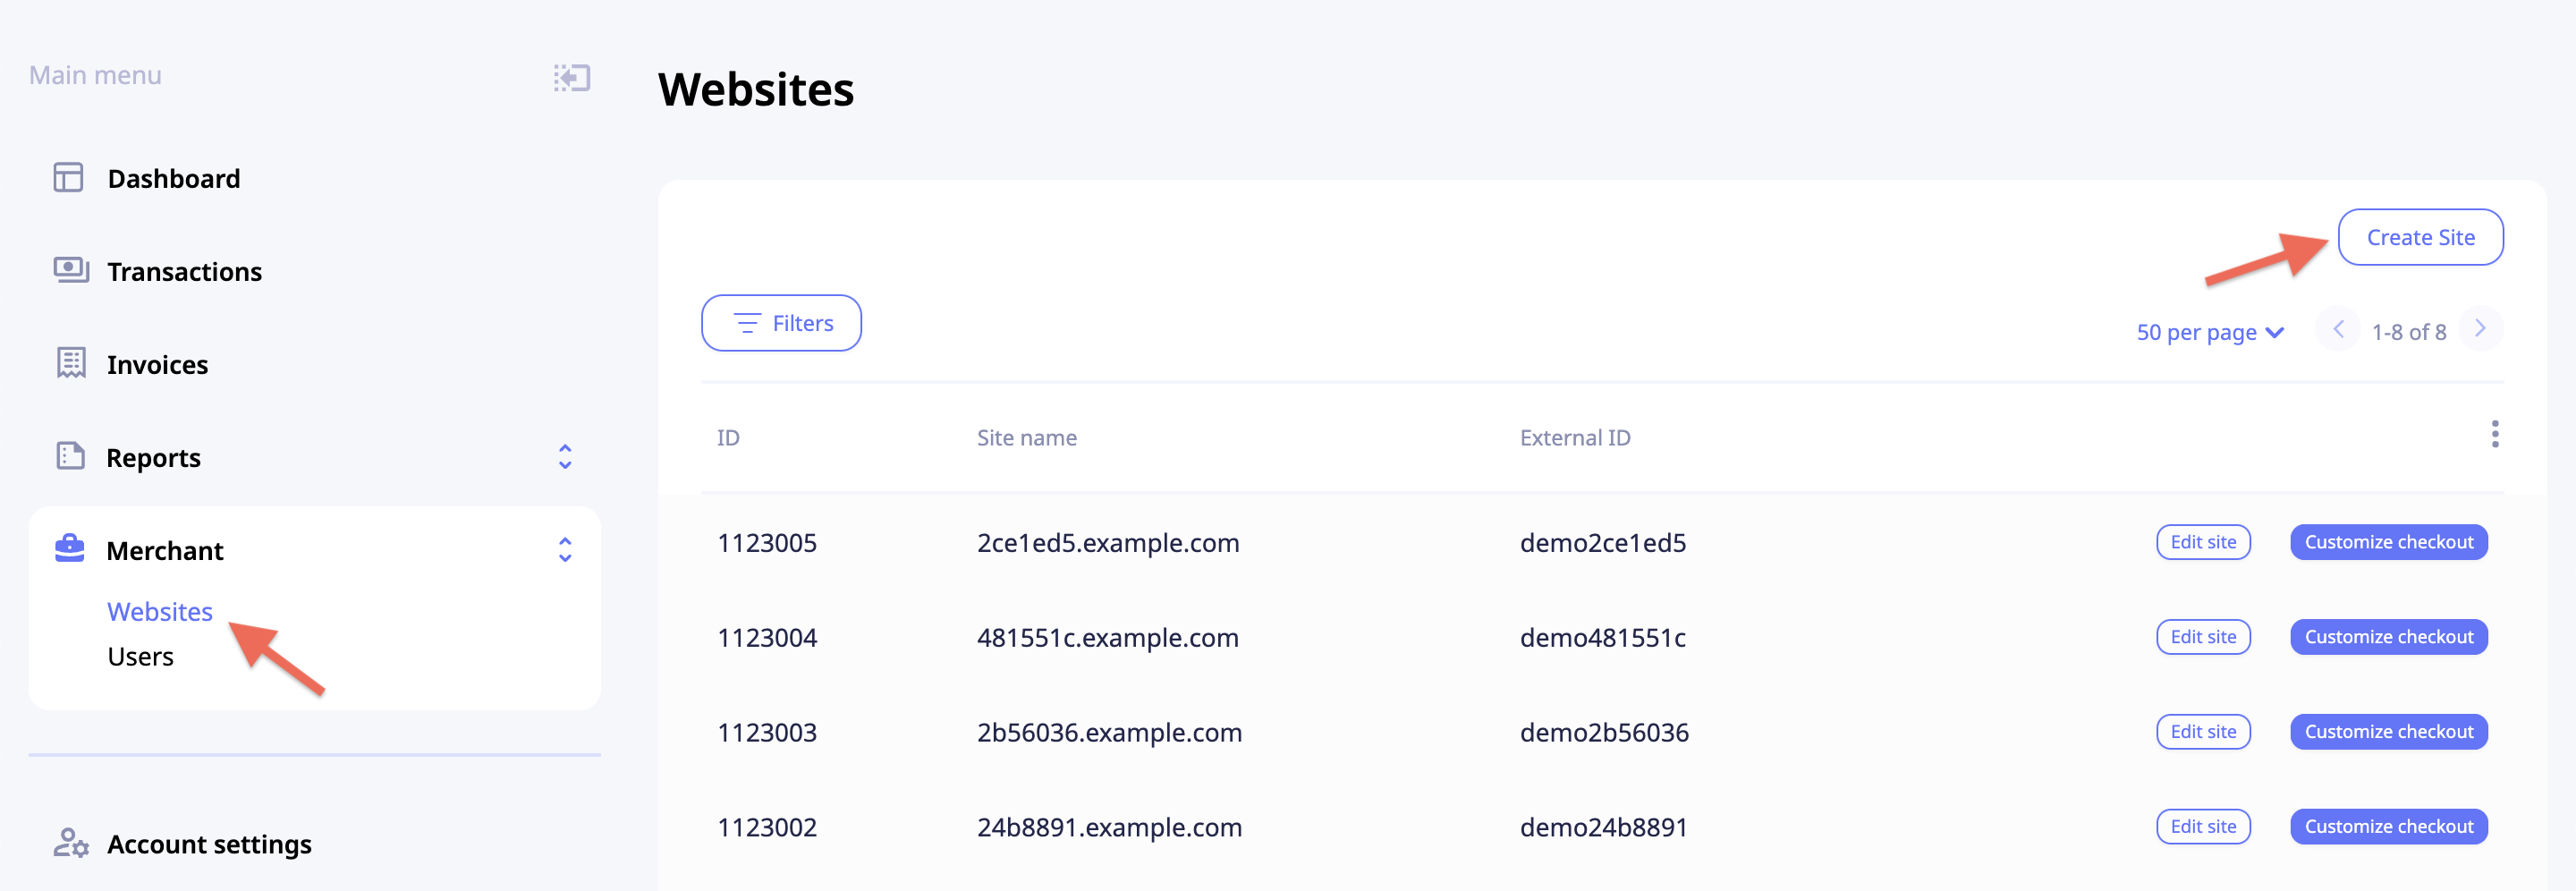
Manage websites
To access the Websites menu, click Merchant and then Websites.
Create a new website
To create a new website:
- Expand the Merchant dropdown to the left, click Websites, and then Create Site in the top right corner of the Websites Table.
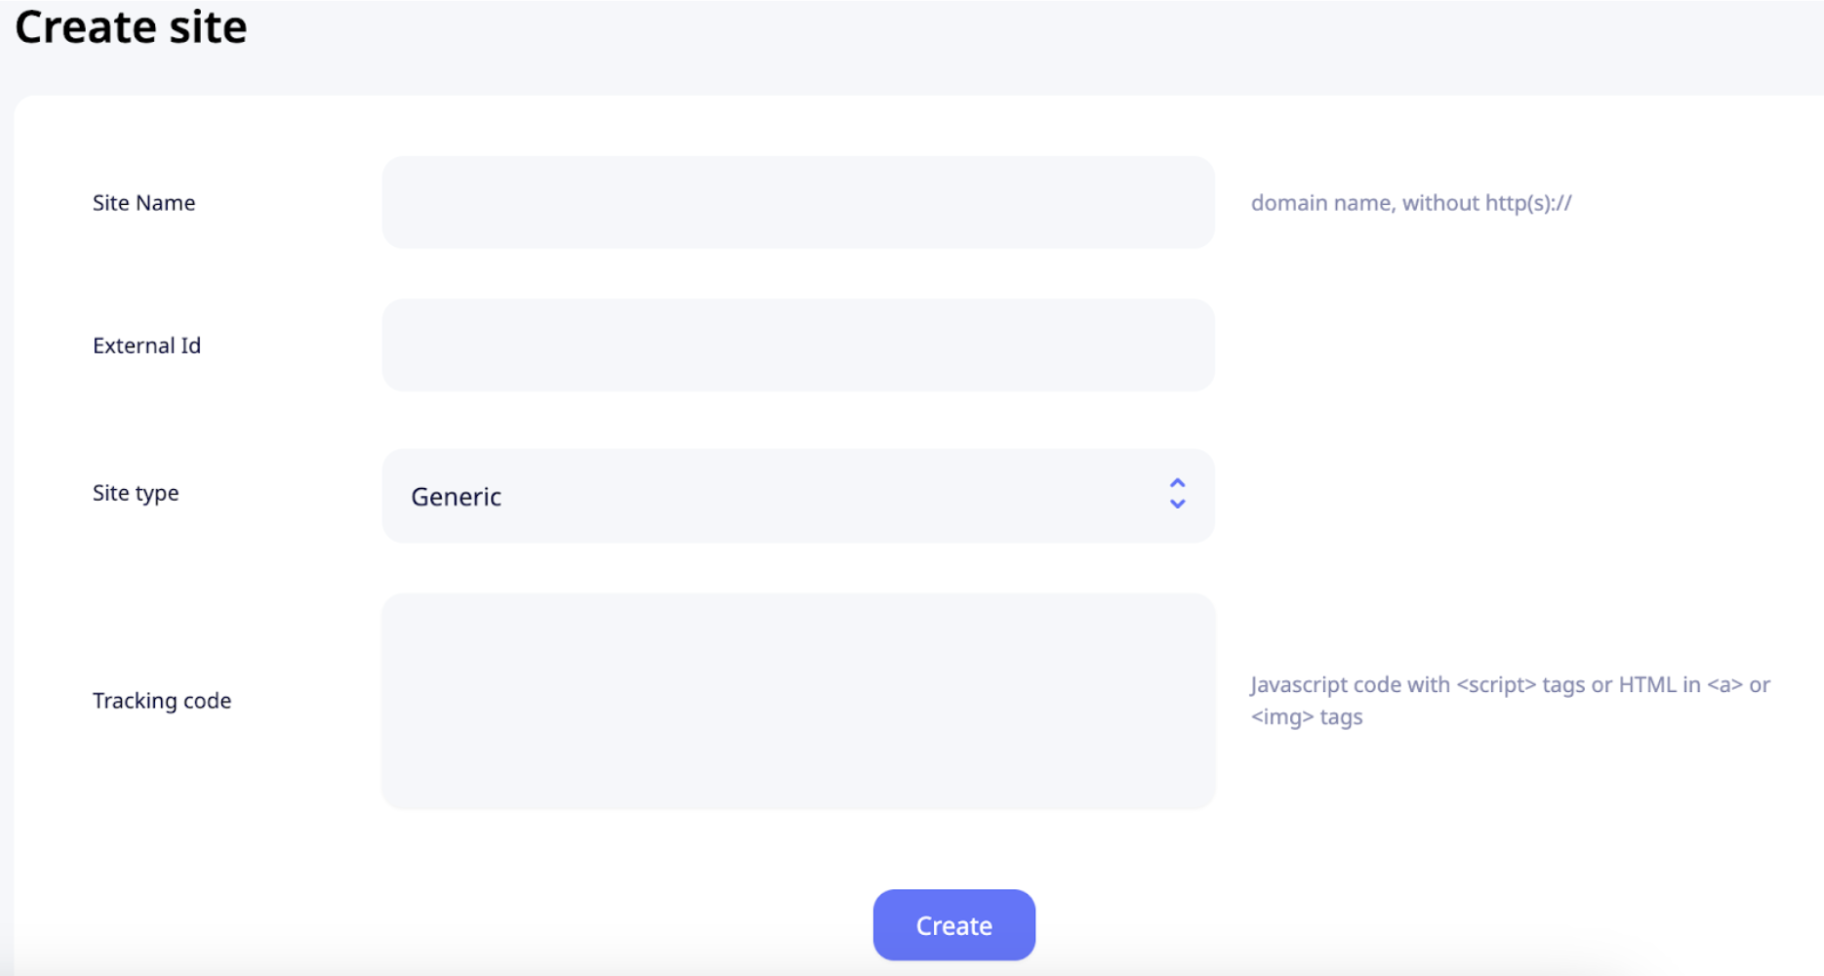
- Fill out the site name and external ID (the site's identificator within your system), select the site type, and add the tracking code. The available site types are:
- Generic
- WooCommerce. Check out this link for more info on WooCommerce.
- NATs v.3/v.4. Note, that a NATs website requires additional information. Follow the link for more on NATS.
- Click Create.
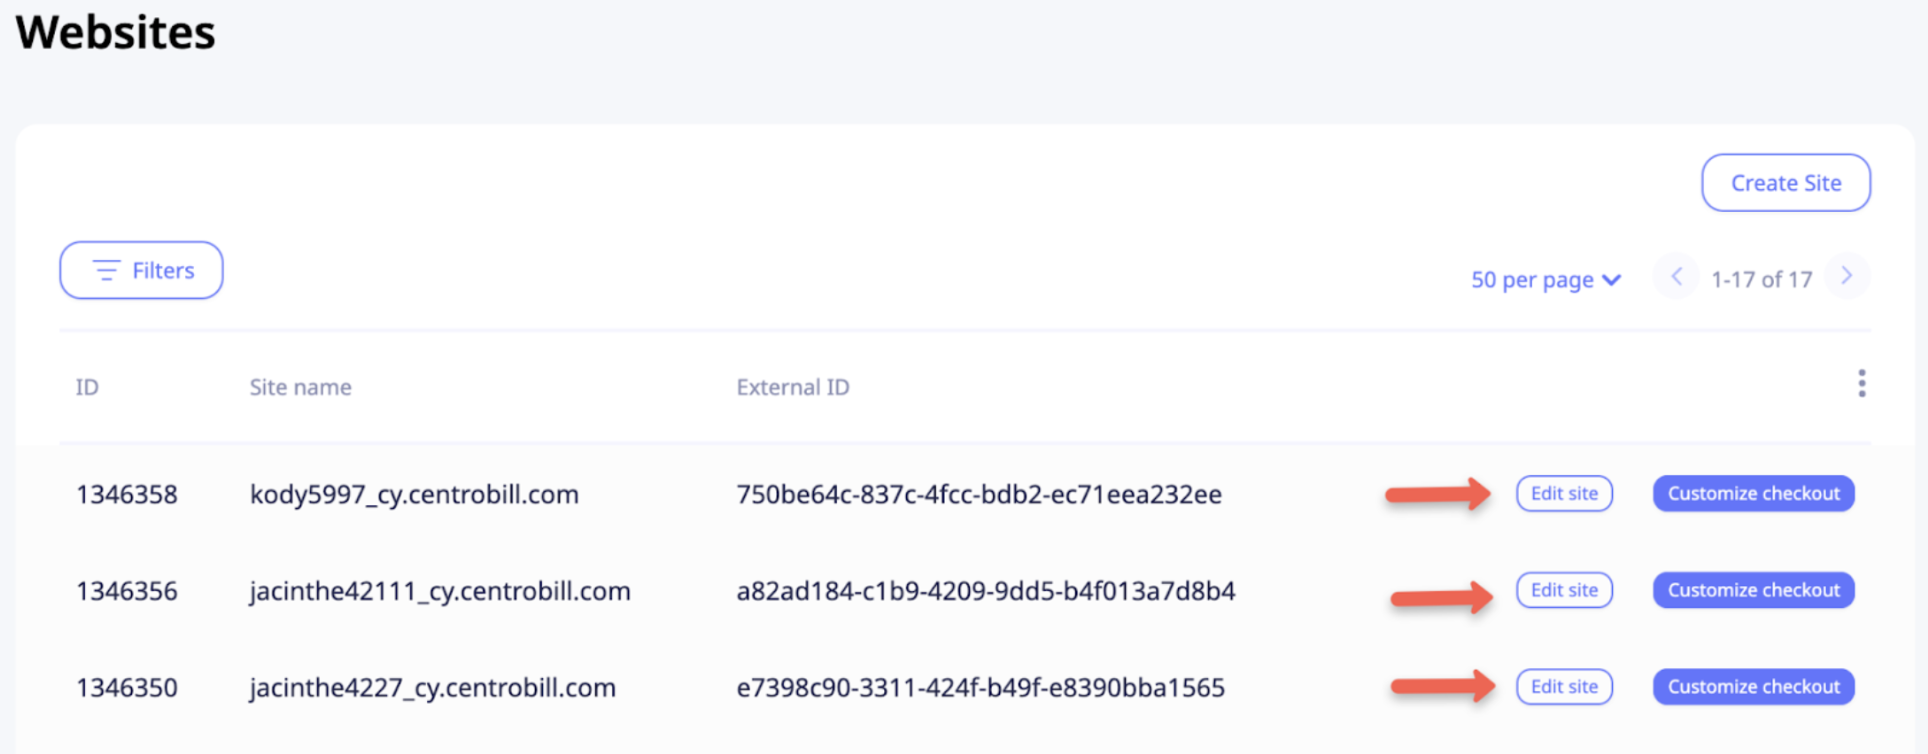
Once completed, your website will appear in the Websites list alongside any previously created sites. From this list, you can edit your website — adjusting any of the settings you configured — or customize the checkout page.
Edit website
To edit a website, click Edit site next to the website in question.
Display/hide website
To display/hide the website, set the website’s status to:
Visible : the default setting.
Hidden : use this status to exclude a website from the Websites table.
You can apply this setting when creating a website or change it later while editing the website.
NoteThis setting only affects how websites are marked and filtered in the Websites table. It does not restrict actual access to the site.
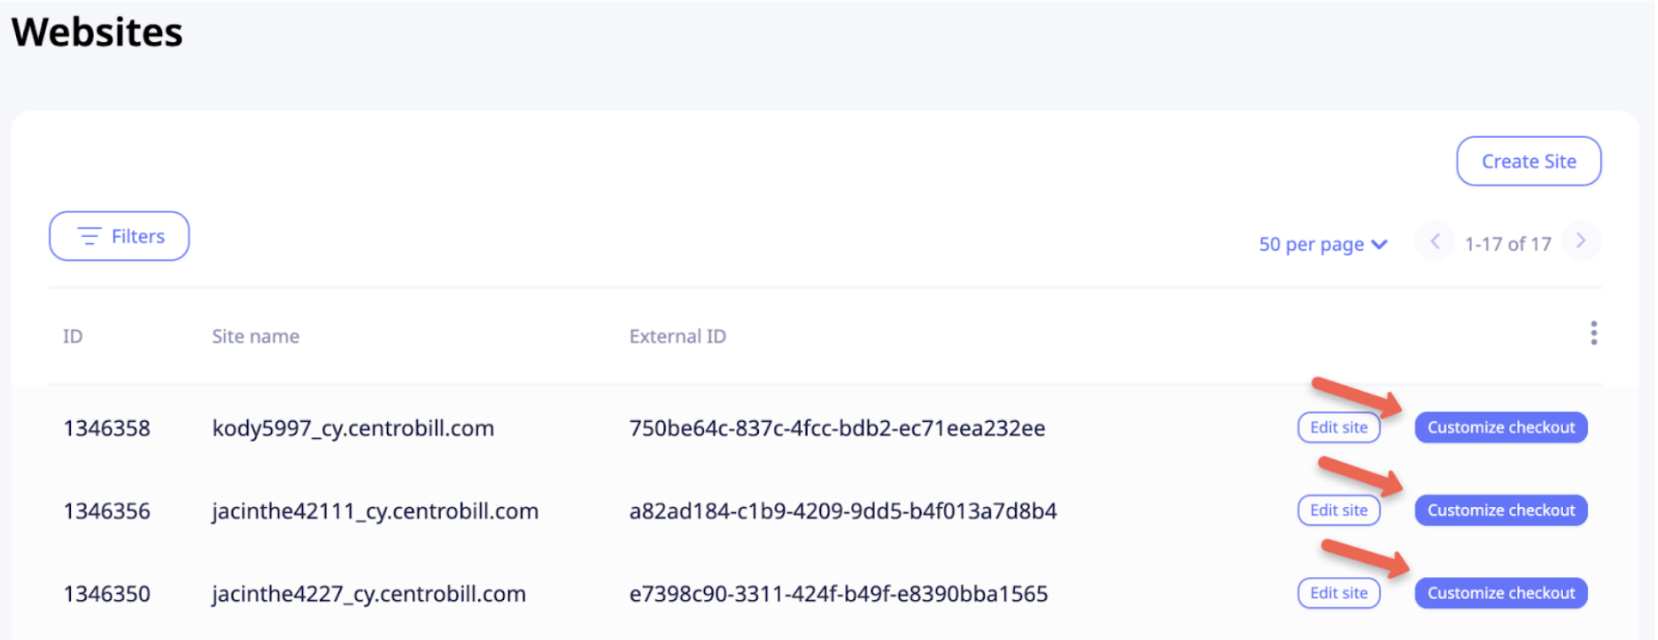
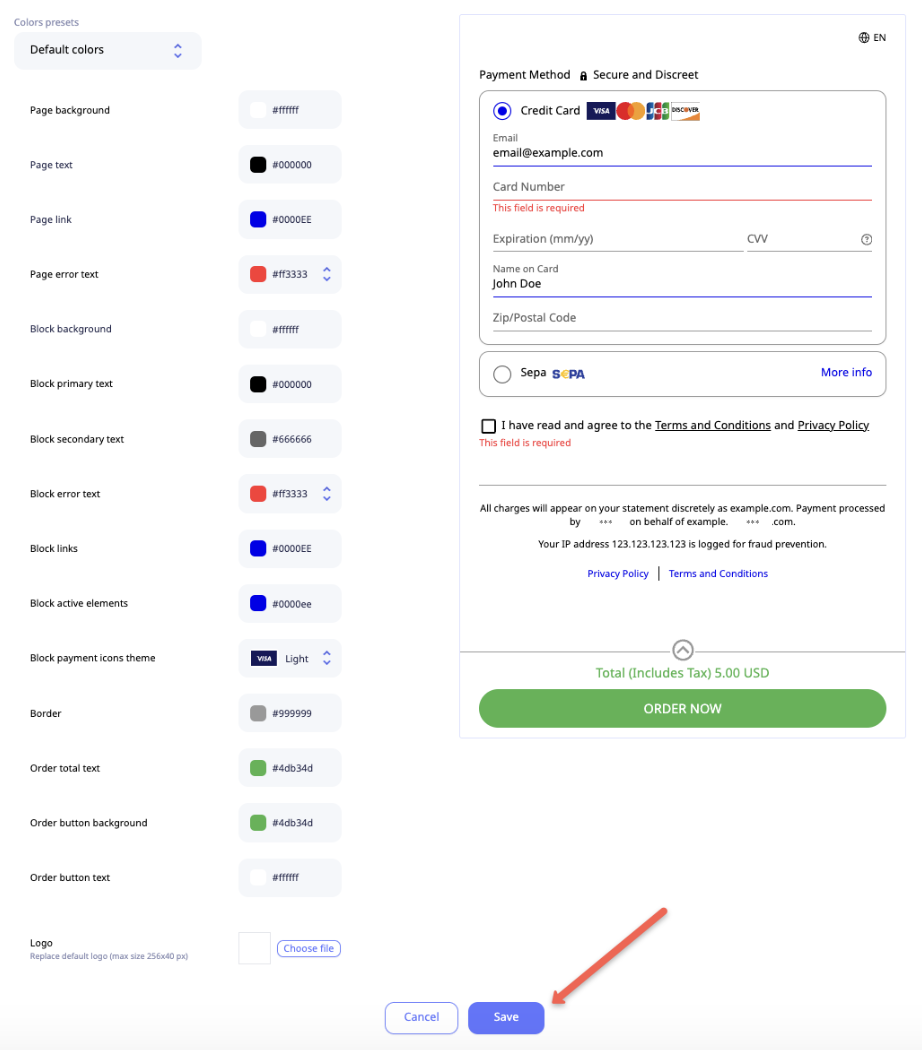
Customize checkout page for website
To customize the checkout page and match it with your website theme, click Customize checkout next to the website.
Feel free to play around with different elements and colors in the customization menu to see what suits your website best. Once you are happy with the customization, click Save.
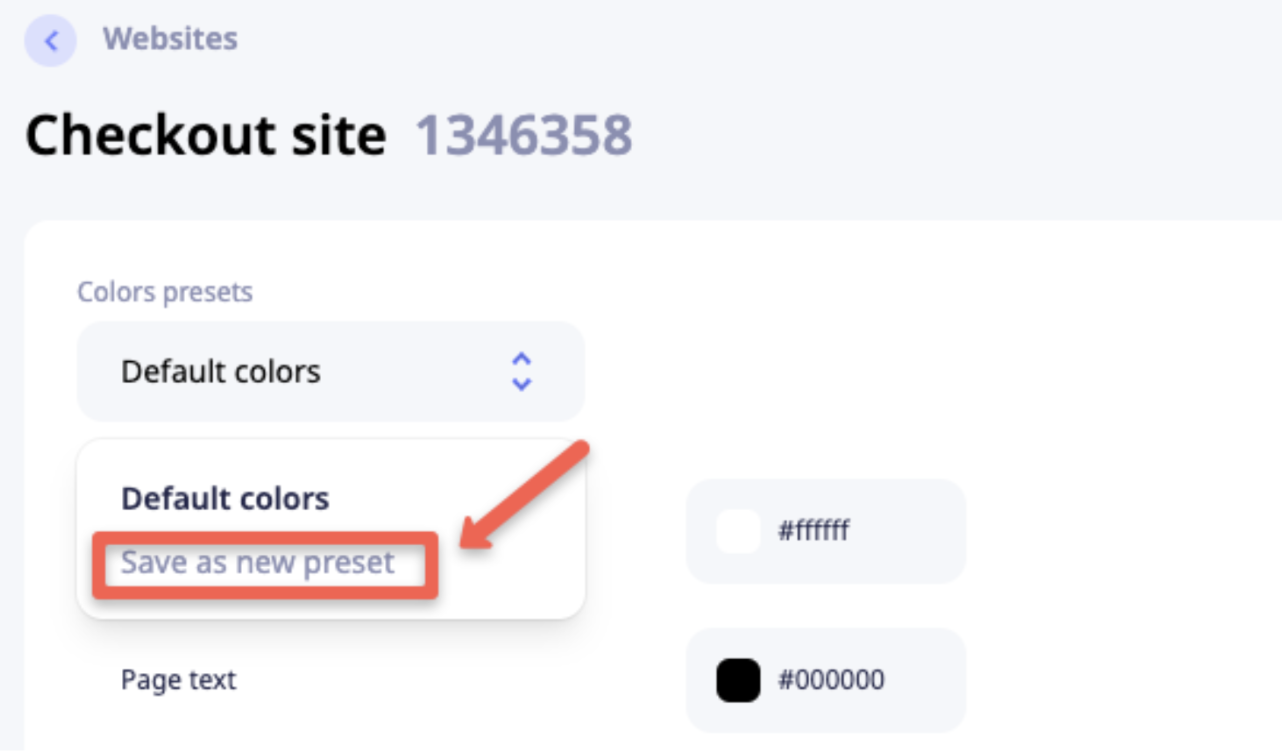
Save color preset
First, select the needed colors and then click Save as new preset on the presets dropdown.
Then, click Savein the bottom of the screen to apply the preset to the checkout page. After that, you can use the saved preset for other websites as well.
Apply colors without saving the preset
Select all colors you need and click Save in the bottom of the screen.
Filter the Websites table
To filter the Websites table, click Filters, select the needed filter(s), and then click Apply. Available filters:
- Site name
- ID
- External ID
- Status

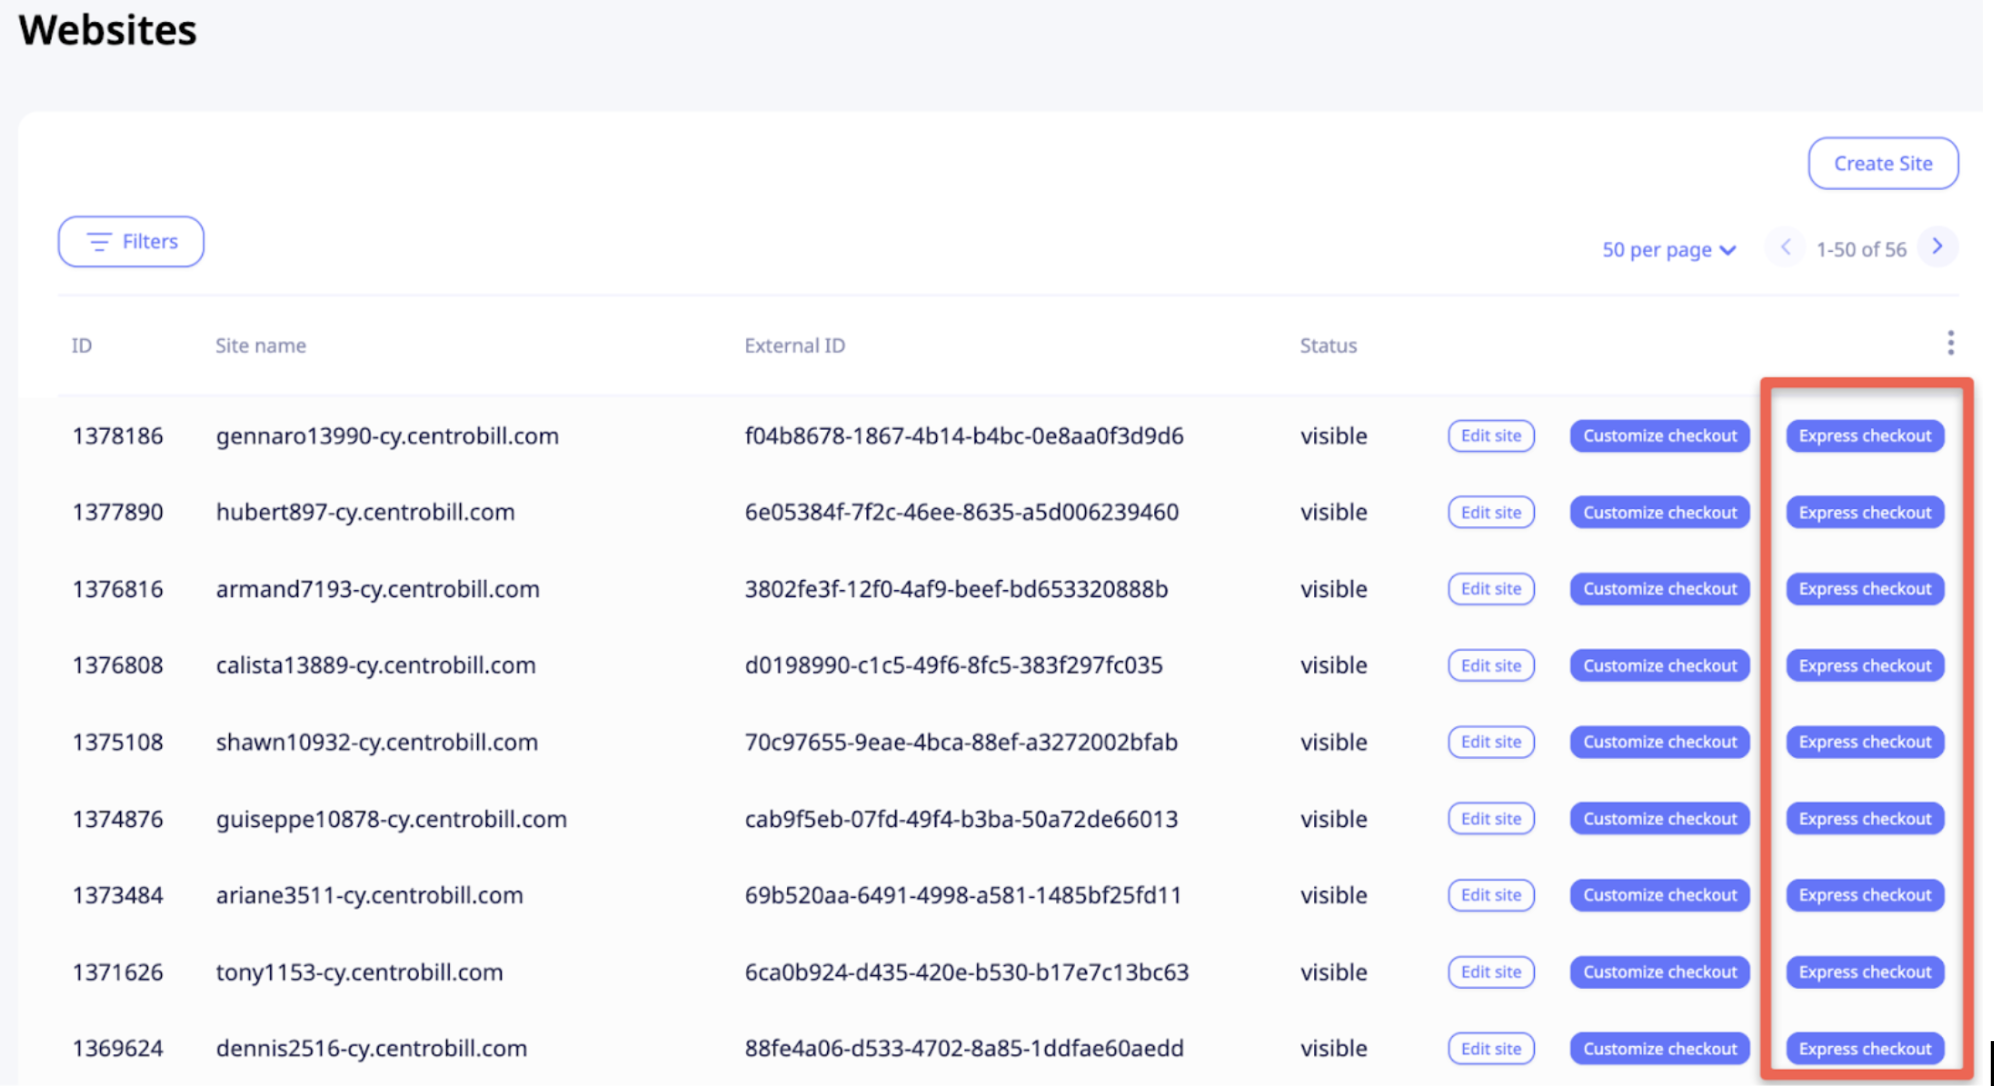
Add express checkout for websites
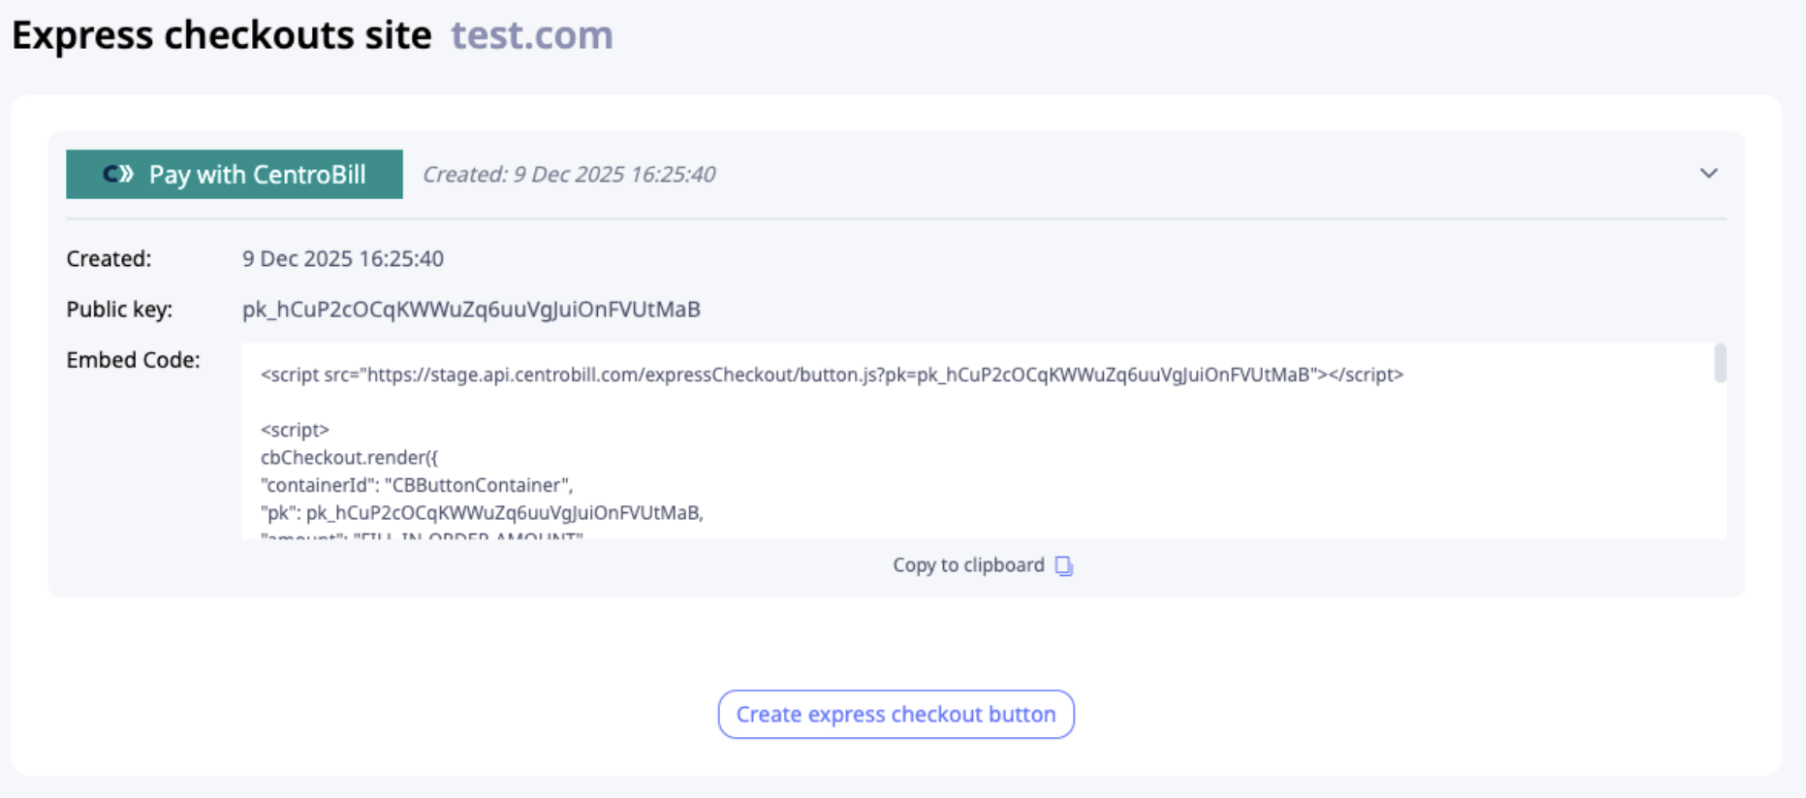
- To create an express checkout button for your website, click Create Express Checkout next to the website.
-
Copy the provided embed code and add it to your website where you want the button to appear.
-
If you need multiple buttons, repeat the process by clicking Create Express Checkout again and integrating each button separately.
For a detailed walkthrough of the integration process, see the Express Checkout Integration flow