
Manage express checkout
An express checkout button lets your customers pay directly from your website. Each button has its own product type, price and look. You create buttons separately for each website.
View your express checkout buttons
- In the left-hand sidebar, select Merchant.
- Click Websites.
- Find your website in the table and click Express checkout.
The Express Checkouts table shows these columns:
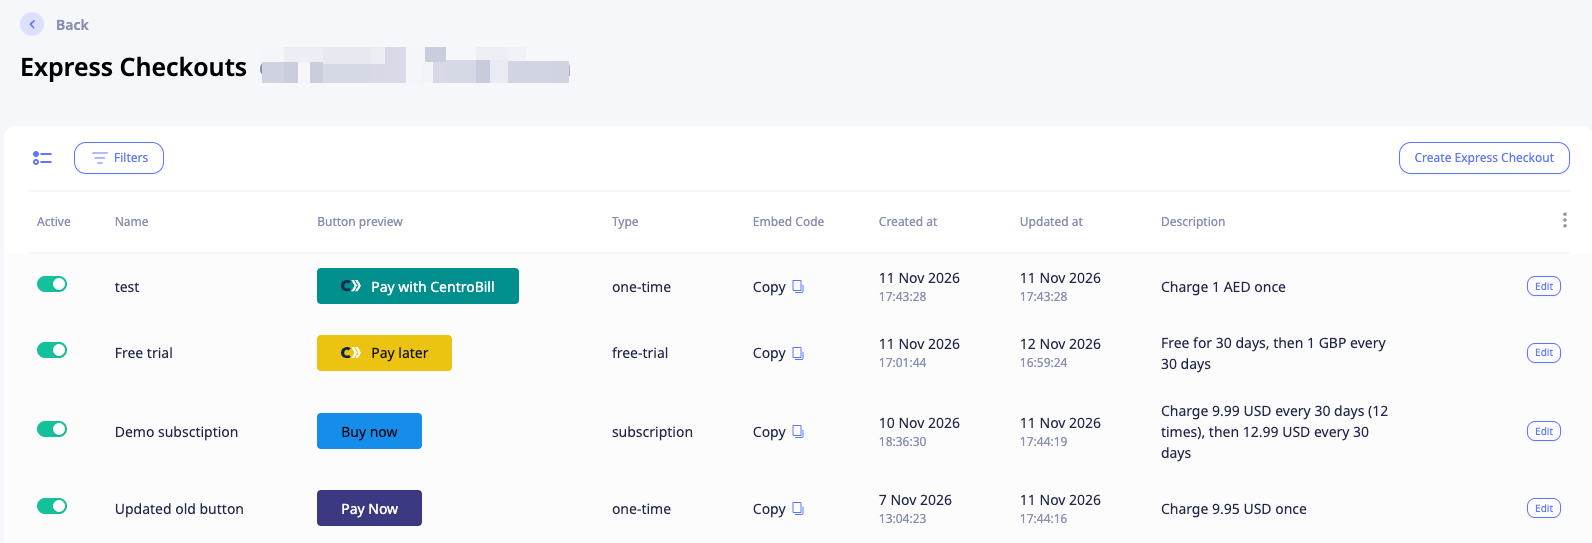
| Column | Description |
|---|---|
| Active | Turns the button on or off |
| Name | The button name, if you added one |
| Button preview | How the button looks on your website |
| Type | The product type of the button |
| Embed Code | Click Copy to copy the embed code |
| Created at | The date the button was created |
| Updated at | The date the button was last changed |
| Description | A short pricing summary, e.g. Free for 30 days, then 1 GBP every 30 days |
Create an express checkout button
-
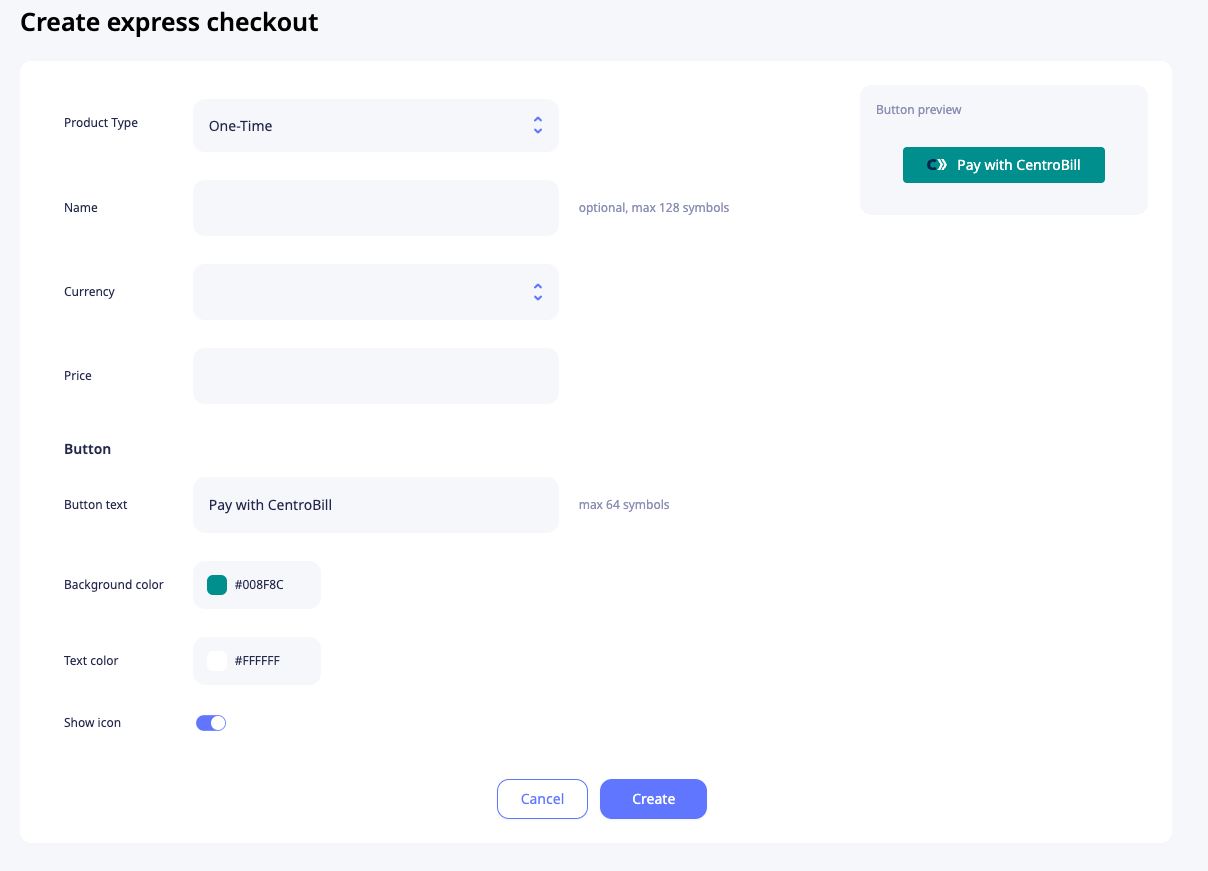
Click Create Express Checkout in the top-right corner of the table.
-
Select a Product Type:
Type Description One-Time A single, flat-rate charge Subscription A recurring charge at a set billing frequency Trial An introductory price that automatically converts to a standard subscription Free Trial A zero-cost introductory period ( 0.00initial price) that automatically converts to a paid subscription -
Optionally, enter a Name (up to 128 characters). It helps you find the button in the table.
-
Select the Currency. All prices of the button use this currency.
-
Fill in the price fields. The form shows only the fields for the selected product type:
Type Fields One-Time Price Subscription Recurring price, billing interval (days) and Repeat (unlimited or a set number of times) Trial Trial period (days), initial price and the subscription settings Free Trial Free period (days) and the subscription settings. The initial price is always 0.00 -
In the Button section, set up how the button looks:
- Button text: up to 64 characters
- Background color
- Text color
- Show icon: shows or hides the CentroBill icon on the button
The Button preview on the right shows how the button will look.
-
Click Create. The new button appears in the table.
If a field is not filled in correctly, it is highlighted in red with a message that explains the problem.
Add the button to your website
- In the Embed Code column, click Copy next to the button you need.
- Paste the code into your website where you want the button to appear.
Each button has its own embed code. If you need several buttons, for example with different prices, create a button for each one and add each code separately.
For a detailed walkthrough of the integration process, see the Express Checkout integration flow.
Edit an express checkout button
Click Edit next to the button. You can change the currency, the prices and how the button looks. The product type can't be changed. If you need a different product type, create a new button.
Update the code on your websiteAfter you save your changes, copy the new embed code and replace it on your website. The code that is already on your website keeps the old settings.
Enable or disable a button
To turn a button on or off, click the toggle in the Active column.
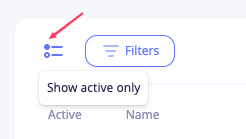
To see only active buttons, click the Show active only icon in the top-left corner of the table. Click it again to show all buttons.
Filter express checkout buttons
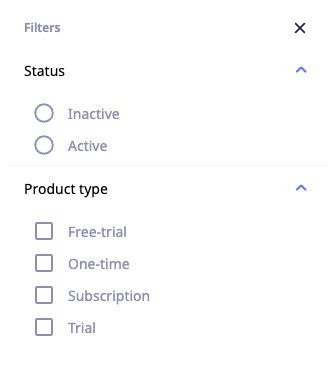
Click Filters at the top of the table, select the filters you need, and click Apply. You can filter by:
| Filter | Description |
|---|---|
| Status | Show only Active or Inactive buttons |
| Product type | Show buttons of one or more types (One-time, Subscription, etc.) |
Updated 10 days ago