
Customize checkout page
You can change the look of the checkout page so it matches your website theme.
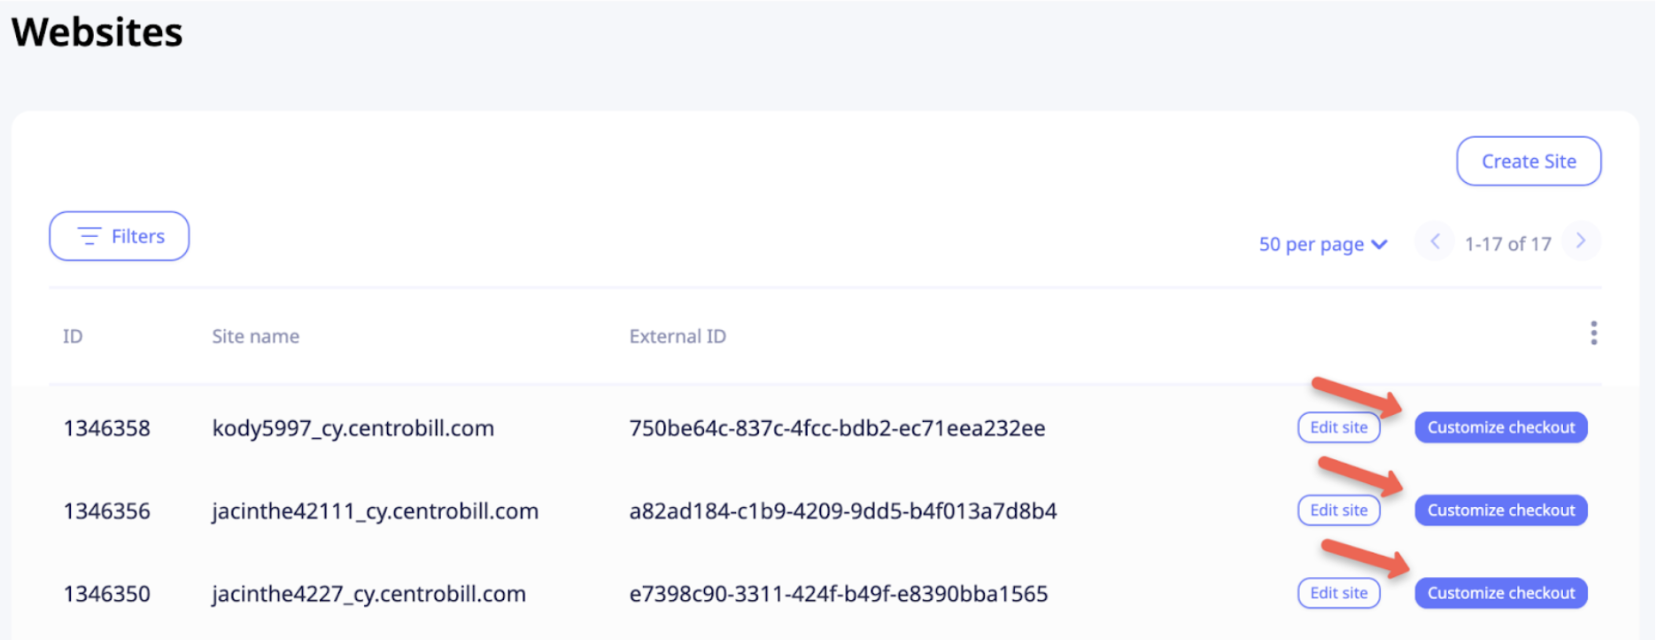
- In the left-hand sidebar, select Merchant.
- Click Websites.
- Find your website in the table and click Customize checkout.
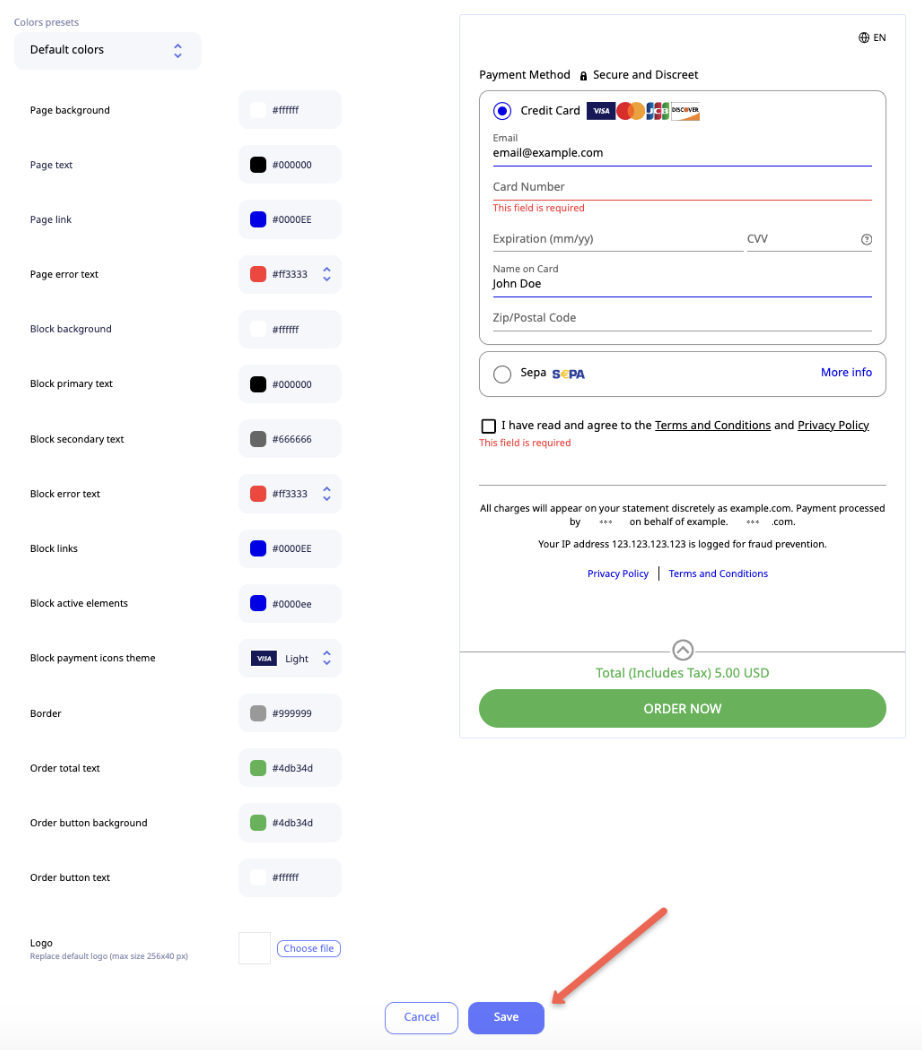
Try different elements and colors in the customization menu to see what suits your website best. When you are happy with the result, click Save.
Add a logo
Upload your logo in the Logo field of the customization menu. The logo must meet these rules:
| Rule | Value |
|---|---|
| Format | PNG, JPEG or SVG |
| File size | Up to 256 KB |
| Size | Recommended 256x40 px. A horizontal logo looks best. |
If the file doesn't meet the rules, you see an error message and the logo is not saved.
Save a color preset
A preset saves your colors so you can use them for other websites. You can also save your logo with the preset.
- Select the colors you need. If you want to save the logo with the preset, upload it first.
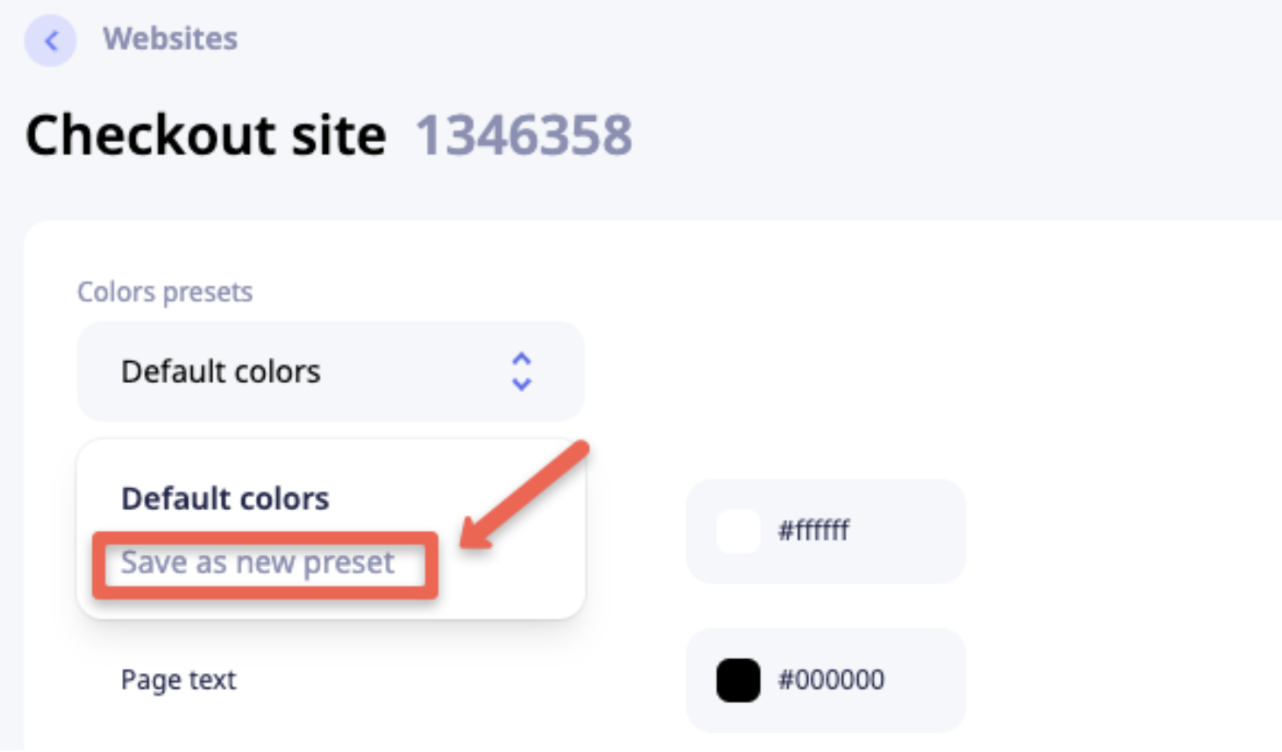
- In the Colors presets dropdown, click Save as new preset.
- Enter a name in the New preset name field.
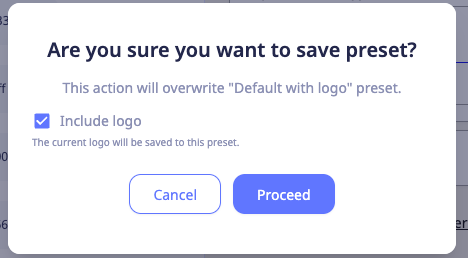
- To save the current logo with the preset, select Include logo. This checkbox is not selected by default.
- Click Proceed.
Then click Save at the bottom of the screen to apply the preset to the checkout page.
In the Colors presets dropdown, presets with a logo have a small logo icon next to their name.
Apply a saved preset
Select a preset in the Colors presets dropdown and click Save at the bottom of the screen.
- If the preset has a logo, it replaces the current logo on the checkout page.
- If the preset has no logo, the current logo stays.
NoteA preset keeps its own copy of the logo. If you change the logo on your website later, the preset doesn't change. If you delete a preset, the logo stays on the checkout pages where it is already applied.
Update a preset
You can overwrite a saved preset with the current colors and logo.
- Select the preset in the Colors presets dropdown and make the changes you need.
- Click Save next to the dropdown.
- In the confirmation dialog, choose what to do with the logo:
- Select Include logo to save the current logo to the preset.
- Clear Include logo to remove the logo from the preset.
- Click Proceed. The preset is overwritten.
Apply colors without saving a preset
Select the colors you need and click Save at the bottom of the screen.
Updated 10 days ago